Node steward accounts
However, in this initial setup, that’s probably just you. Let’s go through the process of setting up an account for you to administer the node.
Storing the admin credentials
Presuming that you’ve just installed lores-node with Co-op Cloud, you should now be able to visit it’s url in your browser, something like https://lores-node.YOUR_SERVER_DOMAIN, and you’ll see the following:
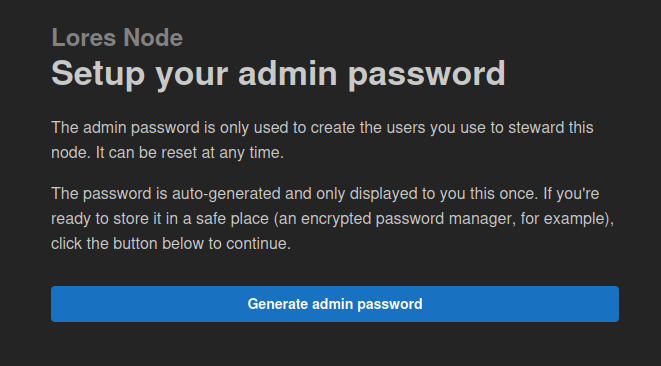
When you’re ready to get started, go ahead and hit “Generate admin password”, and when you’re given the admin password, store that somewhere in password manager.
Creating your Node Steward account
To manage accounts for Node Steward, you log into the admin interface at https://lores-node.YOUR_SERVER_DOMAIN/admin. This just requires the admin password you already saved.
On that screen, hit the plus (+) button and give your new node steward a display name. That doesn’t have to be unique, there’s a unique ID generated for each steward, but just a name that makes sense amongst your fellow Node Stewards.
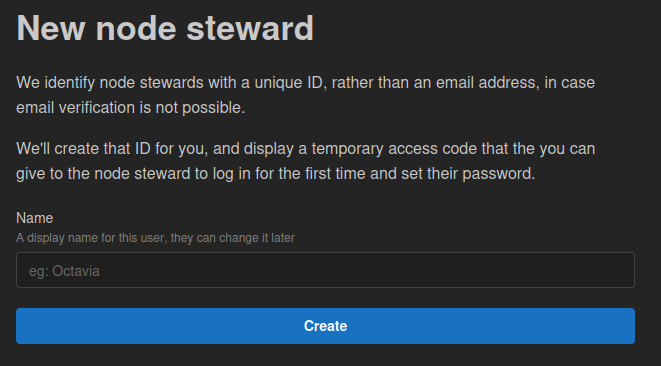
You will then see a screen with temporary login details for the new node steward. These consist of an ID, and a temporary access code, which can be used once to login and set a password.
Node Stewards are often added in person, and maybe even when the internet is down, so we tried to keep these codes fairly short, so that you can just read them from one screen and type into another.
In this case, we’re creating a Node Steward account for ourselves, so it’s probably easiest to hit the “Copy details to clipboard” button, and paste these details temporarily into a text editor for the next step.
Setting your Node Steward password
To set your password, go back to the main page at https://lores-node.YOUR_SERVER_DOMAIN and hit “log in”.
On the log in page, you’ll notice that it says “If you are a new node steward, you will have been given a one-use token to set a password.”, and to set a password is a link to /auth/node_steward/set_password. Go to that page and pop in your node steward ID, your one-use token, and your new password.
Of course you’re no doubt using a password manager for this, generating a strong password, and storing it with the ID. You wont need the one-use token again.
After that, you can go ahead and log in as normal.