Custom SD card imaging
So the MicroSD card that you’re going to insert into a Raspberry Pi needs to be loaded with the operating system that will run the Pi.
We’re going to use Ubuntu Linux for this.
The Raspberry Pi Imager
To install an operating system for the Pi onto a MicroSD card, you need some software called the Raspberry Pi Imager. You can download it on this page (for Linux, Windows or macOS) — and you install it on your dev computer (or in fact any computer with access to a MicroSD card reader).
These instructions assume version 2.0.0 of the Imager. If you installed an older version (perhaps by installing it via a package manager), it’s worth making sure you grab the latest version from the install page.
Using the Imager
The imager has various setup steps, see the instructions below for each step.
Device
Make sure you select the correct Raspberry Pi model, eg the “Raspberry Pi 5”. Press next.
OS
We’re going to select an operating system here. The imager presents the Raspberry Pi OS as the first choice, which is not what we want. Instead, you’ll need to scroll down and select “Other general-purpose OS”.
Inside this section, choose “Ubuntu”.
Inside this section, scroll down and select the first option that contains that words “Ubuntu Server”, “LTS” and “64-bit”. For example, Ubuntu Server 24.04.3 LTS (64-bit).
With that done, press next.
Storage
Put the SD Card into your card reader, and on this screen select the SD Card you’ve just inserted. Ensure you have the correct device, as it’ll be completely wiped and you’ll lose anything on it. The imager program will exclude your internal hard disks from the list of options, so it’s not likely you’ll make a mistake here.
Customisation
This section has a bunch of setup options which can be pretty helpful for setting up a new Pi. These write to text files used to configure cloud-init, a tool that sets up servers. A more advanced technique would be to write to these files directly, but for now let’s use the options provider by the imager.
Fill out each of the sections below, and then hit “Next” to move on.
Hostname
You need to choose a hostname for this Pi. It should be short, and lower case, but also unique on your local network. Unless you’re in a workshop or something where multiple people are setting up a LoRes Node, I’d recommend that you call it lores. If you’ve got multiple LoRes Nodes on the same location, you’ll need to give them more unique hostnames, like lores-testing or something.
Localisation
Localisation asks you to fill out your:
- Capital city (and Country), eg: Canberra (Australia)
- Time zone, eg: Australia/Melbourne
- Keyboard layout, eg: au
User
So back on the Login details page we discussed a username and password, here’s where you pop them in.
Wi-Fi
Put in the SSID and password for your Wi-Fi network. On many platforms the Raspberry Pi Imager is able to detect this automatically and pop it in for you.
In Login details we also setup a SSH key-pair, and so we’re going to use that. Select “Use public key authentication”. For public key, browse to the public key file that you created. On Linux it is generally found at /home/USERNAME/.ssh/id_ed22519.pub. Remember that it’s the pub file that you want here. Either select the file in the browse box, or copy the files content and paste it in.
Remote access
We’re definitely going to log in using SSH, so toggle “Enable SSH” to on.
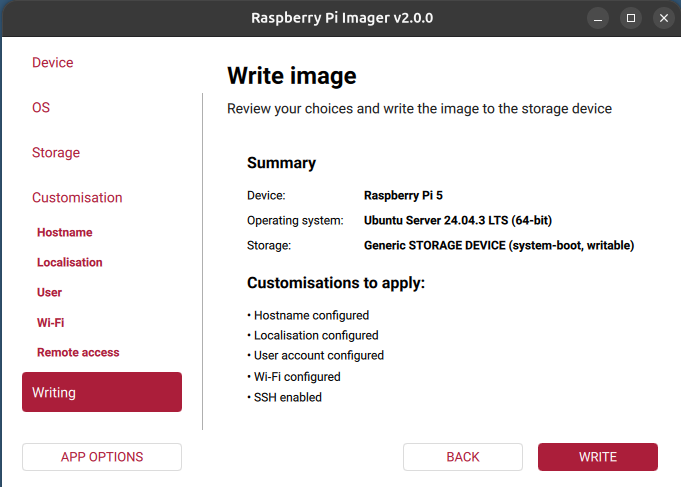
Write image
This screen presents a summary of what you’ve chosen. It should look something like this. If you’re happy, go ahead and press write.
There may be an additional dialog warning you that data will be erased, and you need to press “I understand, erase and write”.
The SD Card is now being prepared. You make way to make a coffee or something, this takes a little time.
When it’s done, remove the SD card and close Raspberry Pi Imager.